If your lips are looking a bit washed out and you’re hoping to create a bit more definition with a pop of color, then you might want to consider a lip blushing tattoo. This form of semi-permanent makeup is fast becoming the go-to treatment because of the long-term, natural results – but you need to ensure you’re being treated by an industry professional. Here’s what you should know about lip blush and the healing process before you begin.
What is the Lip Blush Treatment?
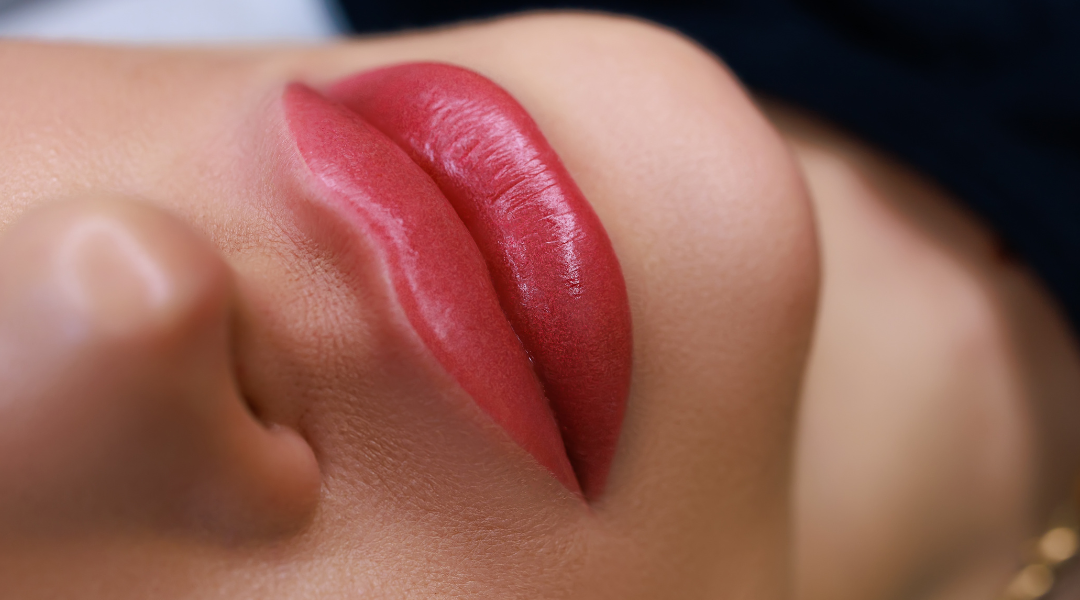
Lip blush is a semi-permanent makeup treatment whereby natural pigmentation is tattooed into the lips to enhance their color and shape. It creates a wonderful base of color so that you don’t have to constantly reapply lipstick, although you can add it if required. It’s important to note the healing process of the lip blush procedure so that you can achieve the desired result.
What is the Lip Blush Healing Process?
The healing process for lip blush often takes around 2 to 4 weeks, during which time you can expect certain changes. The color of your lips will also change, so you mustn’t be too concerned if the desired color is not initially achieved, rather wait until the healing process is complete.
Day 1
On the day of your lip blush procedure, you might notice a bit of discomfort in the form of tenderness as the anesthetic wears off. If you’re more prone to pain sensitivity than others, you might want to consider some over-the-counter pain medication, but this is not always the case.
Your lips will also start swelling during the procedure as a natural response to the tiny incisions being made. This will become more evident once the numbing wears off, with your lips feeling a bit heavy and swollen. Besides the swelling, you might notice that your lips start to discharge some fluid, but this will only last for a few hours after the procedure. You just need to blot this fluid for a while.
Another part of the healing process is that the lip color might get more intense as the day goes by. Do not be alarmed, as the color will settle over the few days.
Day 2
When you awaken on the second day, you can expect your lips to have resumed their normal size, although there might be a bit of swelling and tenderness. If your lips are significantly larger, then contact your aesthetician as you might need to rule out an allergic reaction. The tenderness will feel a bit like a sunburn, and your lips might feel quite dry and tight. You can expect a bit of scabbing on your lips – this is normal – you will just need to apply a moisturizer.
Day 3 to 4
On the third and fourth days, you can expect the healing to be quite tough as your lip dryness gets more intense, resulting in more scabbing and some peeling. There might be some slight itching sensation but avoid the temptation to scratch as this could impact the finished color. The good news is that this is entirely normal, it’s just your body’s way of regenerating the lips.
Days 5 to 10
Once you’re through the toughest period of the lip healing process, you can expect what’s known as ‘color ghosting’ where the pigment starts to settle in under the skin. You will likely still be experiencing some scabbing and peeling on the lips, but this will result in softness. The color could start to fade, but don’t be alarmed, it will eventually settle to the color you requested.
Days 10 to 14
As the second week draws to a close, most of the scabbing and peeling on your lips will have subsided and the final shade will start to emerge. You can still expect the lips to feel dryer and a bit tighter during this time. Simply keep your lips moisturized with a lip balm or other ointment.
After 4 to 6 weeks
After enough time, your skin would have gone through the healing process and repaired itself, with the color settling and the ink becoming visible. During this time, you will have the lip pigmentation you initially requested in the lip blushing consultation.
Around 8 to 9 weeks
You might want to schedule a follow-up appointment with your aesthetician for a lip blush touch-up. This is significantly cheaper and less time-consuming than a full lip blush, and will help to even out any color or neutralize the lip shade where required.
How Do You Help Your Lips Heal?
There are steps you can take to enhance the process so you’re minimizing any discomfort while encouraging your natural healing. Here are some ways you can help the process along.
- Avoid any prolonged sun exposure, particularly during the healing phase, as this will maintain the color and longevity of your lip blush.
- Remember to use an SPF lip balm when you’re going outdoors to protect your lips.
- Avoid using any lip care products that contain retinol or glycolic acid, as these can fade the pigment more quickly.
- Avoid any wetness on your lips except the recommended moisturizer or lip balm.
- Try to avoid touching your lips excessively.
- Avoid using a swimming pool, sauna, or hot bath after the treatment.
- Remember to keep your lips sterile to prevent any infection.
- Don’t place any alcohol, salt, toothpaste, or hot substances on your lips during healing.
- Don’t exfoliate your skin during the healing process, and while you can exfoliate later on, remember it can cause the lip-blushing tattoo to fade quickly.
- Use a straw to drink during the healing process.
- Avoid any teeth whitening products during this time.
Remember that individual healing experiences can vary, but by following your tattoo artist’s aftercare instructions you can help the process. Activities like smoking, sun exposure, and exfoliation can enhance fading, so you might require a touch-up treatment. For the best lip blush treatment in Washington, contact BeautyInk By LeAnne for a consultation, customized treatment, and aftercare support.